Introduction
Slack Apps become more powerful when you fully leverage their capabilities. Beyond sending information to users, you can enable one-click issue remediation and offer significant flexibility. The Home tab for Slack Apps represents an underutilized feature that provides space for dashboards, user interactions through buttons and drop-down selections, or instructional content. This guide walks through essential setup steps for building a Home tab for your Slack App.
Home Tabs Explained
Three key concepts govern Home tab functionality:
App Home Opened Event — A Slack event generates each time a user opens your app and navigates to the Home tab. The critical detail is identifying which user triggered the event.
View — Slack displays information using “views” when someone opens the Home tab. Views can represent previously opened content or newly “published” views created during the event, requiring an API call with a token, user ID, and JSON payload in Slack Block format.
Slack Blocks — These flexible formatting tools display text, buttons, drop-down menus, input fields, and images. The Block Kit Builder provides a convenient interface for construction.
Slack App Setup
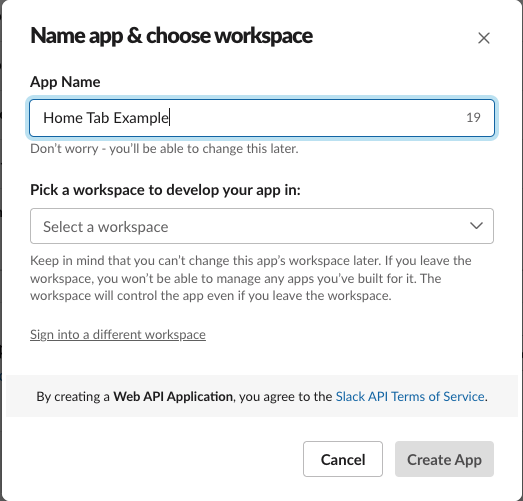
Visit the Slack Apps page at https://api.slack.com/apps/ and click Create New App. A modal prompts you to name your app and select your development workspace. You can rename your app later if needed.
After creation, navigate to Event Subscriptions and toggle Enable Events on.
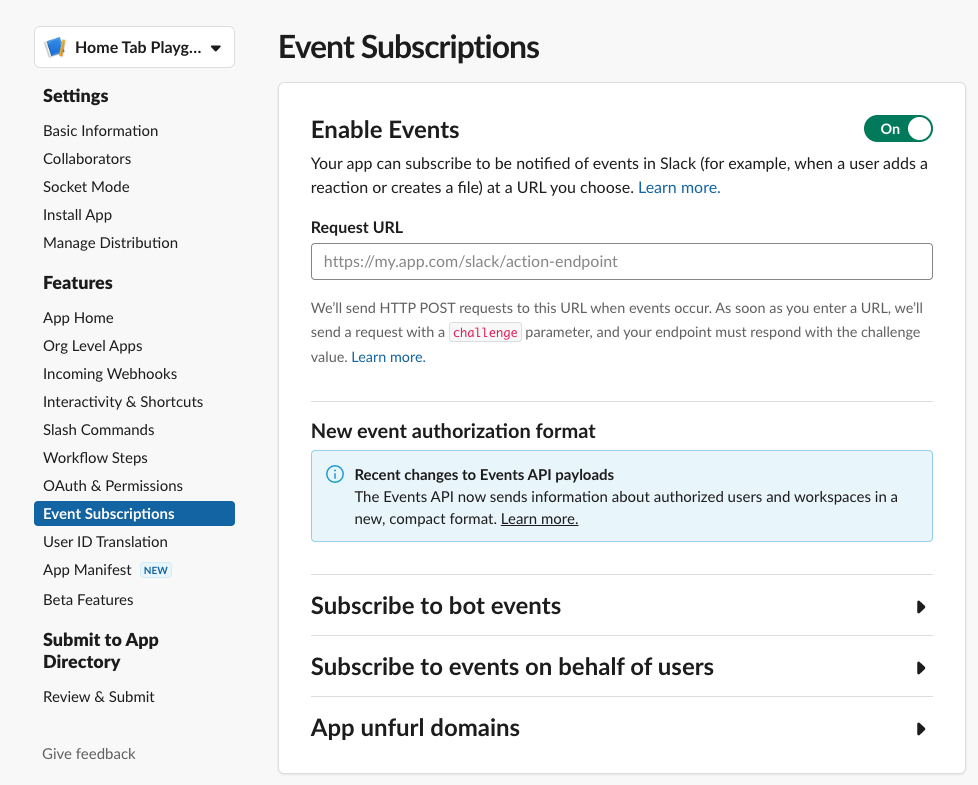 Navigate to the Event Subscriptions page and toggle Enable Events on.
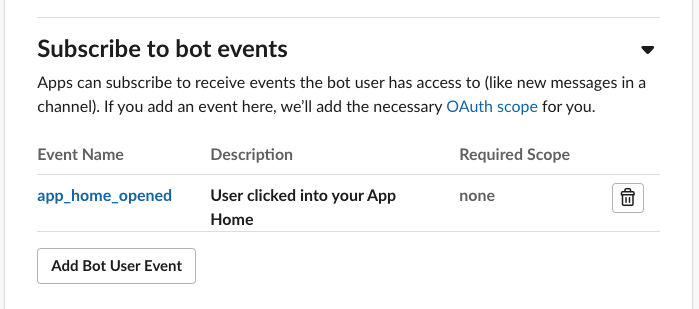
Subscribe to the app_home_opened event under “Subscribe to bot events.”
 Subscribe to the app_home_opened event under “Subscribe to bot events.”
Next, you’ll configure an API endpoint. If using Okta Workflows, proceed to that section. Otherwise, move to the Slack Setup (cont.) section.
Okta Workflows Setup
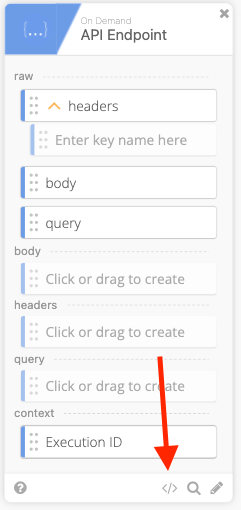
This approach mirrors previous workflow patterns. Create a new Okta Workflow with an API Endpoint trigger card set to “Expose as a public service.” Don’t grab the URL yet — save and enable the flow first.
Add these cards in sequence:
- JSON: Parse — input the Body from the API Endpoint
- Object Get — input the JSON object with “challenge” as the path
- Object Construct — set key to “text” with the retrieved challenge as input
- Return — set Status Code: 200, Headers: {}, Body: Construct Card output
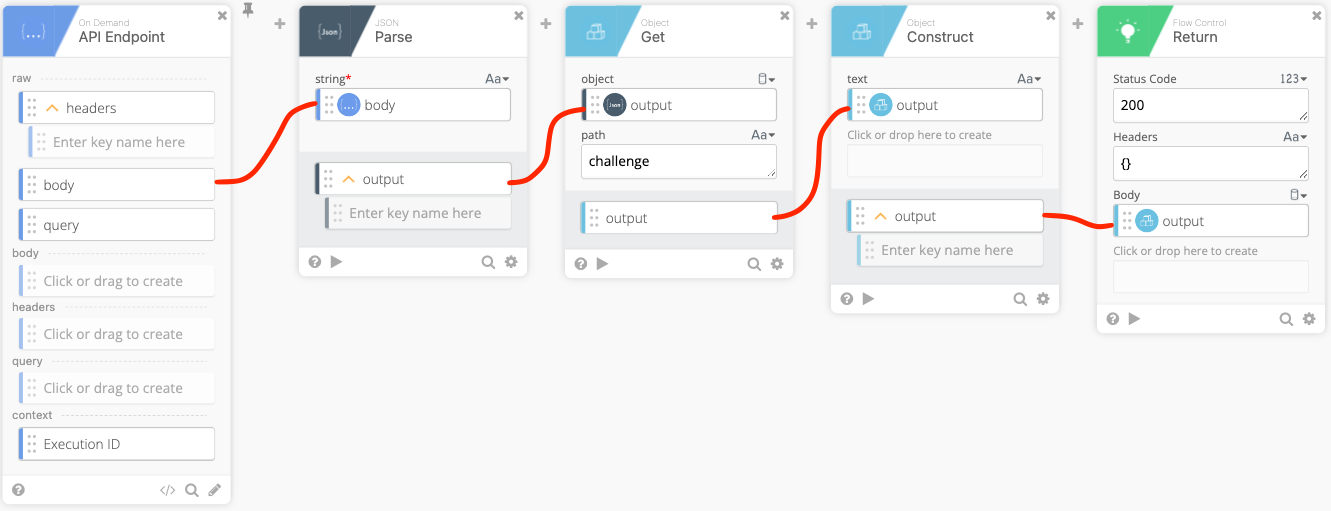
The Construct and Return card keys must match precisely — this proves critical for subsequent Slack configuration.
Save and enable the flow. Click the endpoint configuration button and copy the Invoke URL for the next setup phase.
 Save the flow and enable it. Click the endpoint configuration button and copy the Invoke URL.
Slack App Setup (cont.)
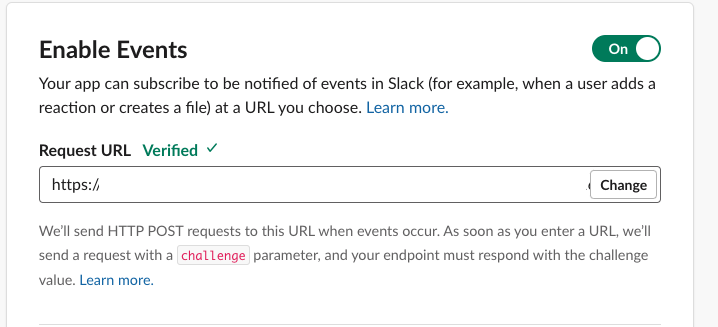
Paste your API Endpoint URL into the Request URL field on the Event Subscriptions page. Your endpoint must handle HTTP POST requests with a challenge parameter and return that challenge value. Upon correct setup, you’ll see a “verified” message next to the Request URL.
Building the Home View
The Home Tab requires a JSON payload with specific structure: View, type: home, blocks containing your Slack Block JSON. A practical example follows this pattern:
- User opens the Slack app
- Workflow verifies user authorization for sensitive information
- If authorized, build blocks from database information
- If unauthorized, display authorization denial message
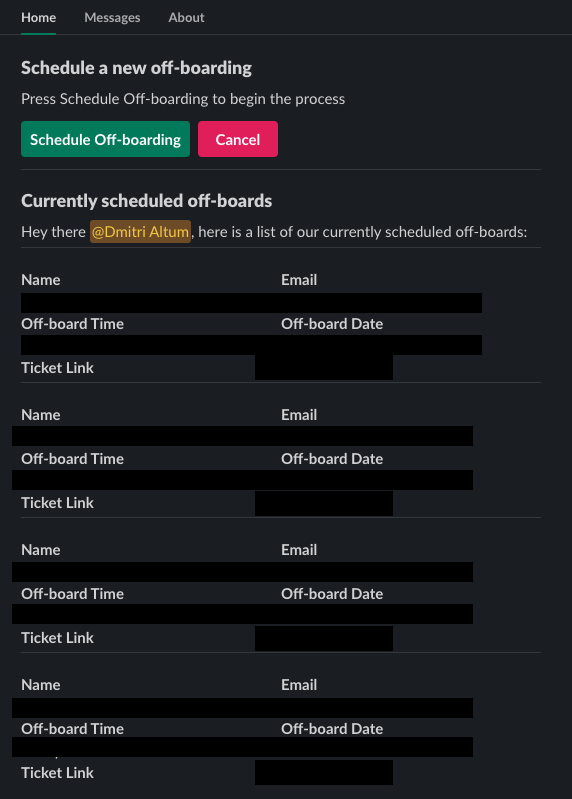
After building your view, publish it using the views.publish API call, which pushes the view to the user. Users can then interact with buttons, drop-down menus, and input fields while accessing your posted information.
Example payload structure:
{
  "view": {
    "type": "home",
    "blocks": [
      {
        "type": "section",
        "text": {
          "type": "plain_text",
          "text": "This is a plain text section block.",
          "emoji": true
        }
      }
    ]
  }
}